Transport Fever 3 Line Manager: Frequency, Rate and Replacing Vehicles
How to set up a line, what frequency, rate and utilization tell you, how to carry more on a busy line, and how to replace, sell, clone or move the vehicles on it, from the official manual.
Last updated Game version: Release version, manual page revised 2026-09-29
The short answer
Frequency is the gap between two vehicles. A shorter gap means vehicles come more often. Frequency and rate
Rate is how much the line carries. It counts passengers or cargo per station and year. What the figures mean
Busy line? Add vehicles or bigger, faster ones. Alternative terminals help a crowded station. Carry more
Replace, sell and clone in the line manager. Select the vehicles in its middle list first. All vehicle actions
How to make a line
Open the line manager from the toolbar. Its top part lists your lines and depots, the middle part lists the vehicles of whatever you tick up there, and the bottom part shows the stops and figures of the selected line.
Press New Line, or click a station while no line is selected. Then click stations to add them as stops, or hold Shift and click to add a waypoint. A new stop goes in after the highlighted row.
The Buy Vehicles button opens the store of the nearest depot that suits the line, so whatever you buy there starts on the line at once. Vehicles are bought in depots and shipyards, planes in the hangars that come with every airport, and helicopters in heliport hangars.
A line is a list of stops. Its vehicles drive from one stop to the next and, after the last one, return to the first, so a line needs two or more stops before it can carry anything. Lines can shuttle back and forth or run in a loop, such as A, B, C, D and back to A. Loops can work for cargo across the map or for town buses, but the manual sees little use for them on long passenger routes, because most passengers later travel back to where they started.
Vehicles take the shortest way from stop to stop. A waypoint makes them pass a given spot without stopping, for example to steer traffic, keep noise away from homes or lead them past a maintenance building. The ships and harbors guide shows waypoints at work on water.
Filter buttons narrow the list to road, tram, train, ship or aircraft lines, or to the lines in view. They combine with each other and with the search field.
From the official manual
Frequency, rate and utilization
Frequency is the time between two vehicles of the same line, measured in real time with the game at normal speed. The shorter it is, the more often a vehicle comes.
Rate is the average number of passengers or cargo units the line carries per station in a year.
Utilization is how full the line is right now: the load on board as a percentage of the capacity of all its vehicles together.
A line's own window starts with its capacity, what is on board, its rate and its frequency, then shows noise and pollution, last year's passengers or cargo, its vehicles and a balance chart. A year in which the blue bar stands above the red one was a profitable year. A vehicle's window repeats the rate and frequency of its line and adds its load, how well it is maintained and its own balance chart.
The line statistics window lists every line with its vehicles, cargo, load, capacity, utilization, satisfaction, frequency, rate, yearly balance and any problems, and you can sort by each of them. The vehicle statistics do the same for single vehicles and add each one's condition and age.
How to carry more on a busy line
The station window shows how many passengers of each line are unhappy. When there are many, raise that line's rate: add vehicles, or replace them with bigger or faster ones.
Every terminal and the waiting halls of a station hold a limited number of people, and the station window shows those limits. Once a station is overcrowded, passengers start to leave it.
A stop can also hold vehicles for an extra wait after loading and unloading, and the game uses that time to spread the line's vehicles evenly.
To find a bigger or faster model, compare capacity and speed in the vehicle database. How long vehicles wait at each stop also depends on the loading settings explained in the cargo unloading guide.
Replacing, selling and moving vehicles
To work on several vehicles at once, select them in the middle list; ticking a line or a depot at the top selects all of its vehicles. Which buttons you get depends on the vehicle type and on whether it waits in a depot or runs on a line.
To do this
In the line manager
Swap old vehicles for a newer model
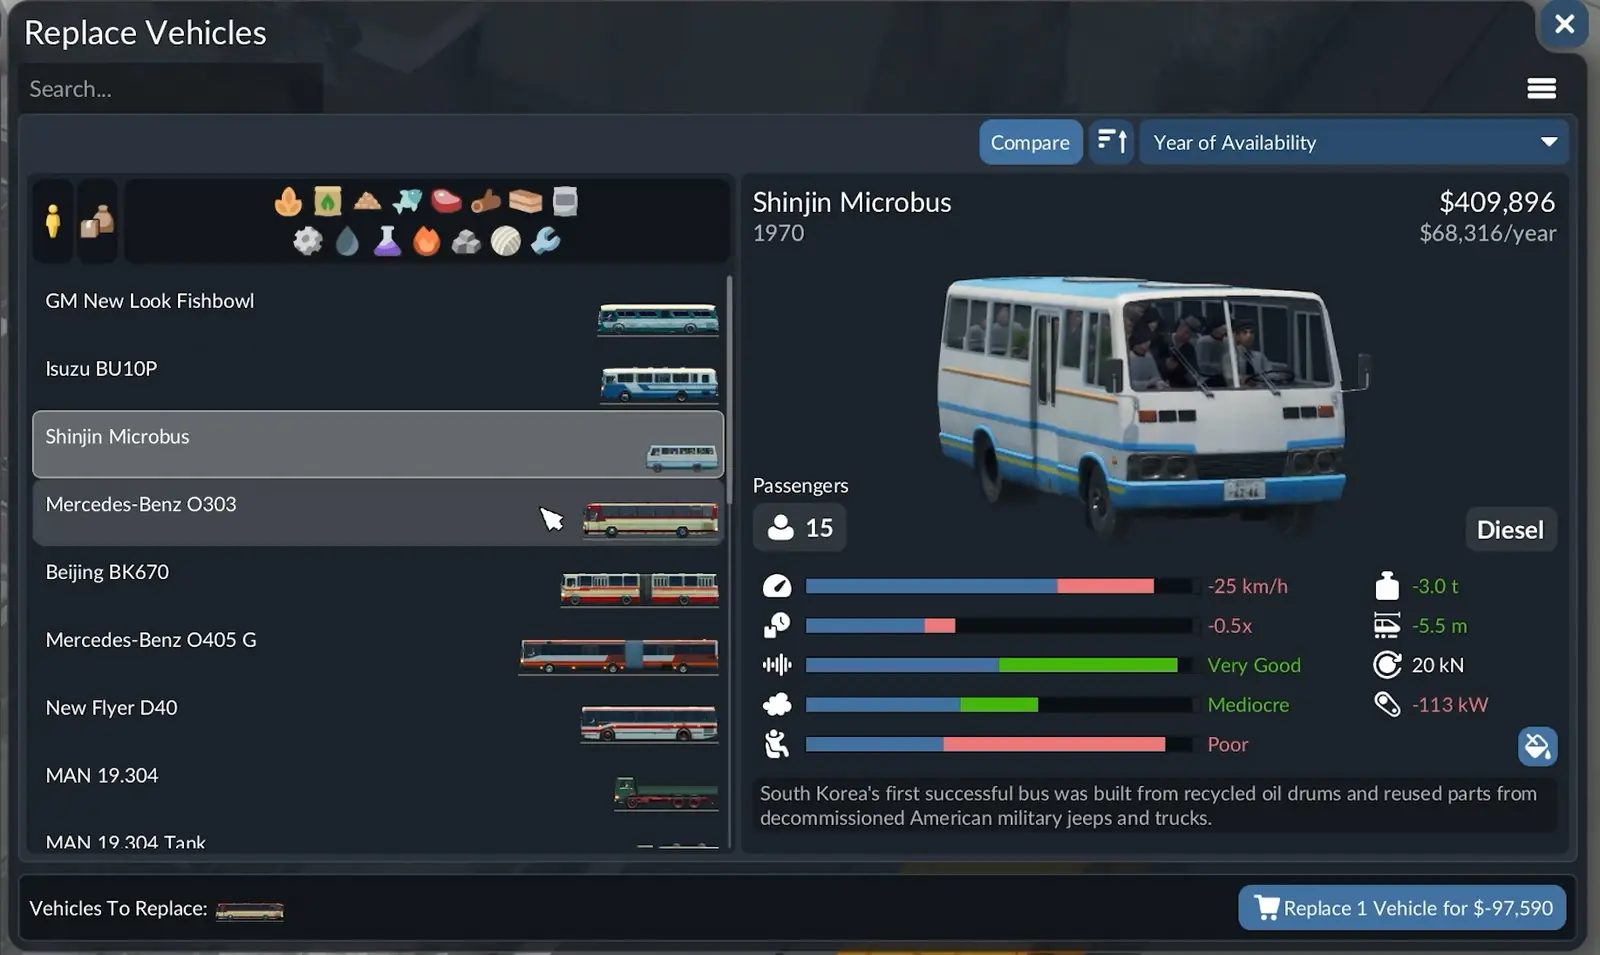
Select them and use replace. A window much like the store lets you choose the model that takes their place.
Put vehicles on a different line
Use send to line and pick the line in the dialog or in 3D. A drop-down sets the stop they head for first.
Get rid of vehicles
Sell them. The game asks you to confirm first.
Take vehicles off their line
Send them to the nearest depot they can reach, or stop them where they are.
Make a train longer or move wagons
Rearrange the train: move wagons inside one train or between the selected trains, or extend it.
Add another vehicle like this one
Clone it. The copy is bought in a suitable depot that may have no connection to the original's line, so check it can get there.
Run vehicles the other way round
Reverse their direction on the line.
Repaint vehicles
Pick a color for single vehicles or for whole trains.
Vehicles cannot move from one depot to another, so buy each one in a depot that can reach its line. A vehicle sent back to a depot heads for the nearest one it can reach, which may not be where it was bought.
Old vehicles and repairs
Every vehicle has a recommended lifespan, and the manual says to replace a vehicle once it is older than that. Depots also repair vehicles within a small radius. Road, rail and water maintenance buildings repair passing vehicles over a wider radius but sell nothing, and aircraft have no maintenance buildings of their own.
In a free game, the Vehicle Maintenance Effect setting decides how much badly maintained older vehicles suffer: they get louder, dirtier and dearer to run, and lose top speed, power and comfort. Setting it to None turns the effect off.
Older models drop out of the store over time: the unlock dates guide explains when.
Terminals and alternative terminals
Each stop gets a terminal automatically, chosen from the platforms its vehicles can reach and how busy they are. To pick one yourself, use the move button on the stop's row or in the HUD. Alternative terminals are used when a vehicle arrives and its own terminal is taken, so several vehicles of one line can stop at the same time. That often lets a station handle more traffic. Switch them on with the alternative terminal button on the stop's row and choose the terminals that may be used.
Where each kind of vehicle picks between its own terminal and an alternative one:
Vehicles
Where they choose
Trains
At the last signal before the station. While the line window or the line manager is open, that signal shows a blinking arrow in the line's color, and every alternative terminal has to be reachable from it or you get a warning.
Road vehicles
At the entrance of the station.
Ships
At the waiting point just outside the harbor.
Aircraft
At the end of the runway.
Hover over a stop's row for buttons to rename it, find it, set what it loads, move it, add alternative terminals or delete it. Drag the handle at the start of the row to put the stops in a different order. Once several trains share a track, the manual recommends signals: see the train signals guide, which also covers line priority.
When a line shows a problem
Besides stops that cannot be reached, a line also gets a problem icon when the same station comes twice in a row or when a stop is at a station meant for another kind of transport. Stops that vehicles cannot reach, for example after tracks or signals were changed, are covered in the cargo unloading guide and the train signals guide.
What the manual does not say
What frequency or rate makes a line good enough: the manual explains both figures but sets no targets.
Whether old vehicles can be renewed automatically. The manual only describes replacing the vehicles you select.
How long the extra wait at a stop can be, or how the game shares it out between vehicles.
Frequently asked questions
What does frequency mean in Transport Fever 3?
Frequency is the time between two vehicles of the same line, measured in real time with the game at normal speed. The shorter it is, the more often a vehicle comes. The line window, the vehicle window and the line statistics all show it.
What is the rate of a line?
Rate is the average number of passengers or cargo units the line carries per station in a year. Utilization is how full the line is right now: the load on board as a percentage of the capacity of all its vehicles together.
How do I increase a line's rate?
The station window shows how many passengers of each line are unhappy. When there are many, raise that line's rate: add vehicles, or replace them with bigger or faster ones. Alternative terminals also let several vehicles of the line stop at a busy station at the same time.
How do I replace old vehicles in Transport Fever 3?
In the line manager, select them and use replace. A window much like the store lets you choose the model that takes their place. Every vehicle has a recommended lifespan, and the manual says to replace a vehicle once it is older than that.
Can I move a vehicle to another depot?
Vehicles cannot move from one depot to another, so buy each one in a depot that can reach its line. A vehicle sent back to a depot heads for the nearest one it can reach, which may not be where it was bought.
How do I make a line in Transport Fever 3?
Open the line manager from the toolbar. Press New Line, or click a station while no line is selected. Then click stations to add them as stops, or hold Shift and click to add a waypoint. A new stop goes in after the highlighted row. The Buy Vehicles button opens the store of the nearest depot that suits the line, so whatever you buy there starts on the line at once.
Sources
The facts on this page come from the official manual:
Lines and Vehicles (making lines, the line manager, vehicle actions, terminals and the line, station and vehicle windows; revised September 29, 2026)
Statistics and Data Layers (what frequency, rate and utilization mean in the line and vehicle statistics; revised September 29, 2026)
Stations and Depots (where vehicles are bought and which buildings repair them; revised September 29, 2026)
Vehicles (the recommended lifespan of vehicles; revised September 28, 2026)
Free Game (the Vehicle Maintenance Effect setting; revised September 29, 2026)
Checked on October 10, 2026. Seen something different in game? Let us know.