Transport Fever 3 Industry Not Producing or Shipping? Every Cause and Fix
Raw industries such as mines and quarries always produce something, but the other 19 industries in the manual wait until cargo reaches their input stock. Whatever an industry makes then sits there until a line that loads that cargo collects it nearby, and once the output stock is full, the surplus is destroyed. Open the industry window and work down the checks below.
Last updated Game version: Release version, manual page revised 2026-09-28
The short answer
Raw or not? Only raw industries produce without deliveries. Makes nothing
Is anything collecting it? A line has to load that cargo at a stop that reaches the industry. Ships nothing
Full stock, lost cargo. Production carries on and the surplus is destroyed. Full stock
Too little? Plots, workers and booster cargo raise output. Makes too little
Start in the industry window
Click the industry on the map, or its name wherever a list shows it, and the industry window opens.
Production comes first: the recipe in small ratio numbers, then what the industry used and made over the last 365 days next to the most it could make in a year.
Booster tells you whether a boost is running. Open it to see which workers have come.
Input Stocks and Output Stocks count the items stored against each limit. Opened up, they list where cargo could come from or go to, and the map draws the same links, moving for the ones in use.
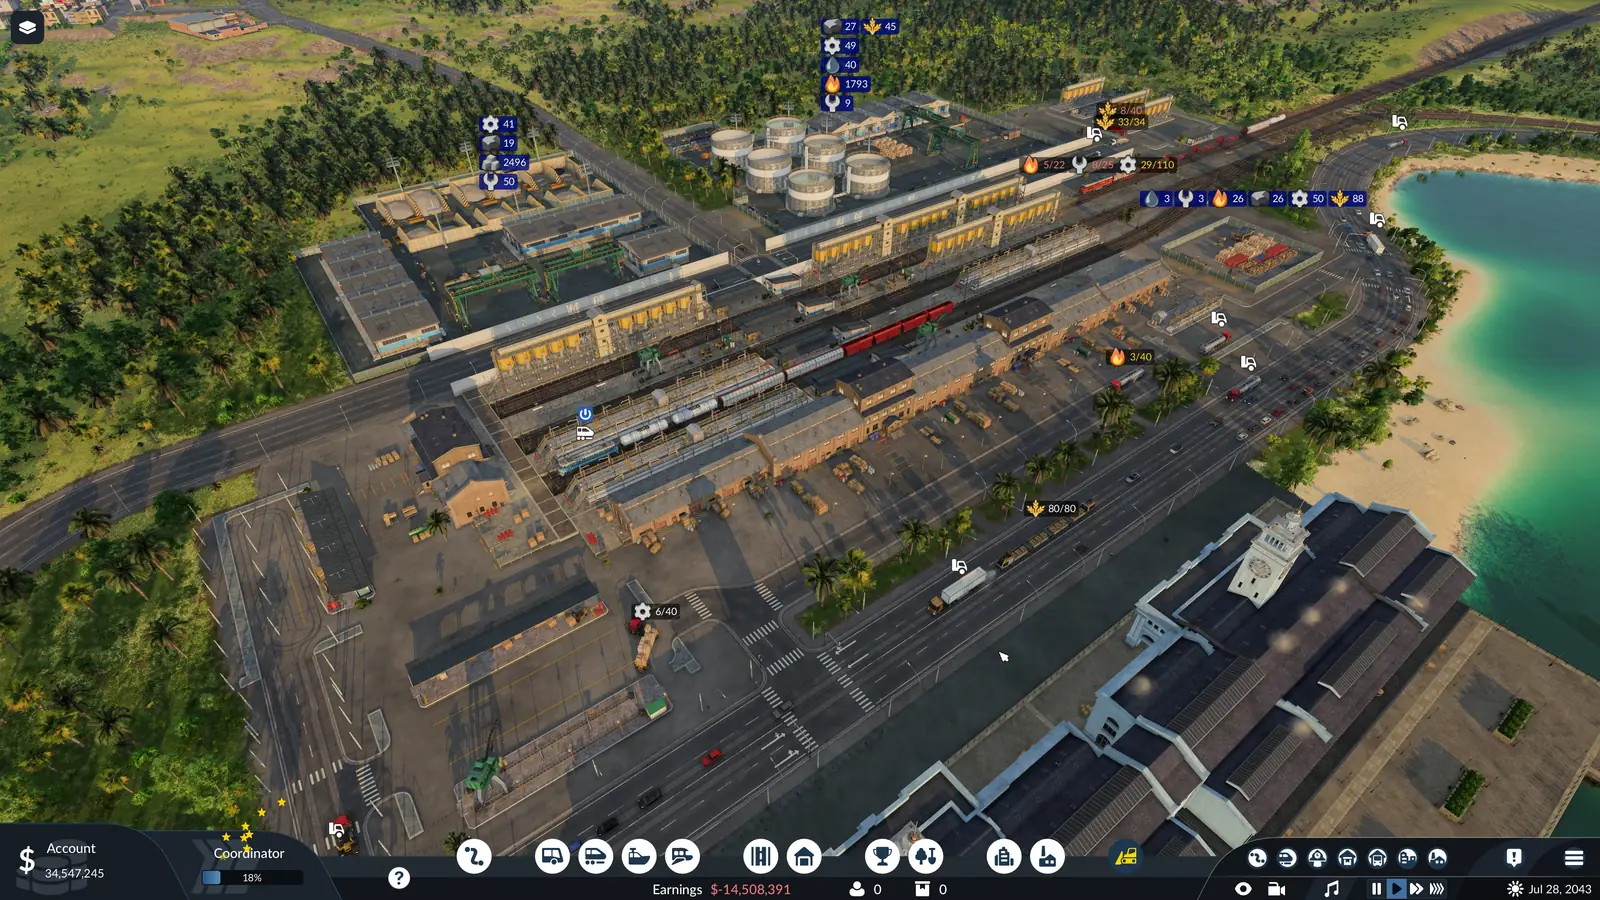
The number floating over the industry on the map is the cargo waiting in its output stock.
Cargo Flow, the chart at the bottom of the window, also shows cargo lost because the output stock was full.
The industry and warehouse statistics each have a Problems column with the game's warnings, and the industry statistics list the cargo every industry needs under Requirements.
It makes nothing at all
A raw industry needs no deliveries and always makes some cargo. The manual's raw industries are the Clay Pit, Coal Mine, Cotton Farm, Crop Farm, Fishing Grounds, Iron Ore Mine, Logging Camp, Oil Platform, Oil Well, Quarry, Rubber Farm, Sand Excavator, and Sand Pit. If one of them looks idle, its cargo is either waiting to be collected or being destroyed: see the next two sections.
Every other industry stays idle until cargo is sitting in its input stock. The recipe at the top of its window names that cargo.
Not every farm is a raw industry: by the manual's recipe, the Livestock Farm turns Grain into Meat and Wool. Until that cargo arrives, it waits like any factory.
What each industry needs before it starts
The recipe of each of the 19 industries that need deliveries, as the manual's industries table gives it. Where it says “or”, either cargo will do. To see how many industries a whole chain needs, use the production chain planner.
Industry
Recipe
Brewery
8 Grain + 3 Glass → 8 Beverages
Brick Works
4 Clay → 4 Bricks
Cement Plant
4 Stone → 2 Cement
Chemical Plant
6 Chemicals → 2 Dyes + 5 Plastic
Canning Factory
(2 Fish or 2 Meat) + 1 Sheet Metal → 2 Canned Food
Furniture Factory
4 Planks + 1 Glass → 2 Furniture
Glass Works
4 Sand → 2 Glass
Livestock Farm
7 Grain → 3 Meat + 4 Wool
Machine Factory
7 Steel + 4 Plastic → 7 Machines
Oil Refinery
4 Crude Oil → 2 Fuel + 1 Fertilizer + 4 Chemicals
Paper Mill
4 Sawdust → 2 Paper
Printing Press
4 Paper + 2 Dyes → 4 Books
Saw Mill
4 Logs → 4 Sawdust + 8 Planks
Steel Mill
6 Iron Ore + 6 Coal → 4 Sheet Metal + 3 Steel
Textile Factory
4 Fabric + 2 Dyes → 3 Clothes
Tire Factory
4 Rubber → 2 Tires
Tool Factory
4 Planks + 2 Plastic → 5 Tools
Vehicle Factory
1 Tires + 4 Sheet Metal + 1 Machines → 1 Vehicles
Weaving Mill
4 Wool → 4 Fabric
It makes cargo, but nothing leaves
Whatever an industry makes stays there until a vehicle collects it, and only a vehicle that can carry it, on a line set to load that cargo at a stop at or close to the industry, will.
Put a cargo stop within reach. For cargo, the industry, town building or warehouse only has to be inside the station's catchment radius. Unlike passengers, cargo needs no path to the station.
Check the stop's settings in the line. Unloading happens on its own. A stop's settings only control which cargo is loaded there, and up to what share of the vehicle.
Look for a problem icon on the line. When a vehicle cannot reach a stop or a terminal, the line gets a problem icon in the line manager, and the warnings at the top of the screen list it. Changing tracks or signals can cause this later.
Where it goes from there is up to you: nothing moves on its own. A vehicle unloads a cargo at each stop where something takes that cargo: an industry that uses it, a town district that asks for it, or a warehouse set up to store it. If the cargo is loaded but never dropped off, the cargo unloading guide lists who takes each cargo.
How many vehicles a line needs, and how to read its rate and frequency, is in the line manager guide.
The output stock is full
A full output stock does not stop the industry. It goes on producing, and every item that no longer fits is destroyed. You can spot it in two places: the waiting number over the industry, and the Cargo Flow chart in its window.
The cure is more pickups: more vehicles or more capacity on the line that serves the industry. It matters most for the six industries whose recipe makes more than one cargo, the Chemical Plant, Crop Farm, Livestock Farm, Oil Refinery, Saw Mill, and Steel Mill. They make every cargo in the recipe, so anything you leave behind is lost once its stock is full.
How much a raw industry makes depends on its plots: its fields, plantations, shafts and so on. Serve a raw industry well and it grows, adding plots on the land around it. Build on that land, or bulldoze one of its plots, and you cap or cut its output.
Any industry can be boosted with workers. Give it a passenger connection, and once enough workers arrive often enough, it produces faster overall; if too few have come lately, the boost switches off.
Booster cargo
A raw industry can also run a booster on cargo. Deliver enough of its booster cargo and the booster starts, drawing items from the input stock until too few are left to keep it going. The booster cargo types are Fertilizer, Machines, and Tools, and the table shows which one each raw industry takes.
When you start a free game, the Economy settings decide part of the answer. Industry Productivity sets how much industries produce in a year: the higher it is, the more often they turn out cargo. Industry Density sets how many industries the map starts with. At lower density each industry produces more. The town population also changes the count, because towns create demand, and more industries appear as the years pass. Every setting is explained in the new game settings guide.
It is about to close
An industry can only be abandoned when all four of these are true:
The Industry Closing Frequency setting is not set to Never.
It has neither used nor made anything for 10 years.
Nothing has been shipped from it for 10 years.
You do not own it.
The countdown lasts 730 days. A notification tells you when an industry is marked, and the countdown appears in it and above the industry. While the calendar is paused, it counts real time instead of days. When the countdown runs out, the industry is gone for good. If it uses, makes or ships anything before then, the countdown stops and the industry stays.
The Industries and Cargo page calls the setting Industry closure frequency. The list of game settings on the Free Game page calls it Industry Closing Frequency and words the rule more briefly: a marked industry closes unless some of its output is delivered before a grace period ends.
Why new industries appear
New industries appear when demand climbs high enough, or when a cargo type is wanted for the first time. You get a notification for each one. A new map does not start with every industry or cargo type; as towns grow, they ask for more, and more complex, goods. Industry Target Density sets how many industries the map works towards over time. New industry types keep appearing over the years, so the count goes up anyway.
Looking for the industry that makes a cargo? The industries and cargo reference shows the maker of every cargo and the climate zones each industry appears in.
What the manual does not say
How many workers count as enough, how often they have to come, or how much faster a boost makes an industry.
How large the input and output stocks are: each industry's window shows its own limits.
Whether industries other than raw ones grow over time: the manual only describes raw industries adding plots.
What happens to deliveries when an input stock is full.
Frequently asked questions
Why is my industry not producing in Transport Fever 3?
It depends on the kind of industry. A raw industry needs no deliveries and always makes some cargo. Every other industry stays idle until cargo is sitting in its input stock. The recipe at the top of its window names that cargo. A full output stock does not stop the industry. It goes on producing, and every item that no longer fits is destroyed.
Why is nothing picked up from my industry?
Whatever an industry makes stays there until a vehicle collects it, and only a vehicle that can carry it, on a line set to load that cargo at a stop at or close to the industry, will. For cargo, the industry, town building or warehouse only has to be inside the station's catchment radius. Unlike passengers, cargo needs no path to the station.
What happens when an industry's output stock is full?
A full output stock does not stop the industry. It goes on producing, and every item that no longer fits is destroyed. You can spot it in two places: the waiting number over the industry, and the Cargo Flow chart in its window.
How do you increase an industry's production in Transport Fever 3?
Any industry can be boosted with workers. Give it a passenger connection, and once enough workers arrive often enough, it produces faster overall; if too few have come lately, the boost switches off. A raw industry can also run a booster on cargo. Deliver enough of its booster cargo and the booster starts, drawing items from the input stock until too few are left to keep it going. For raw industries, plots matter too: serve a raw industry well and it grows, adding plots on the land around it.
Do industries level up in Transport Fever 3?
The manual only describes raw industries growing: serve a raw industry well and it grows, adding plots on the land around it. Build on that land, or bulldoze one of its plots, and you cap or cut its output. It does not say that other industries grow.
Why is my livestock farm not producing?
It is not a raw industry. By the manual's recipe (7 Grain → 3 Meat + 4 Wool), the Livestock Farm turns Grain into Meat and Wool, so it waits until Grain reaches its input stock. Grain comes from the Crop Farm.
When do industries close in Transport Fever 3?
Only when the Industry Closing Frequency setting is not set to Never, it has neither used nor made anything for 10 years, nothing has been shipped from it for 10 years, and you do not own it. Then a 730-day countdown starts. When the countdown runs out, the industry is gone for good. If it uses, makes or ships anything before then, the countdown stops and the industry stays.
Sources
Every fact on this page comes from the official Transport Fever 3 manual:
Industries and Cargo (production, boosters, stocks, new industries and closures; revised September 28, 2026)
Lines and Vehicles (what a stop loads and when a line cannot reach a stop; revised September 29, 2026)
Stations and Depots (the catchment area of a station; revised September 29, 2026)