How town XP works
- Passengers bring XP when they arrive: 5 XP from the same town, 10 XP from a neighboring town, and 20 XP from a town farther away.
- Cargo brings XP item by item: 10 XP per item of the least complex cargo, 20 XP per item of the middle-complexity cargo, and 40 XP per item of the most complex cargo.
- The XP a delivery earns is multiplied by a factor set by the town's Authority and Supplies ratings. Your headquarters adds to that multiplier: 5% at first, more as you expand it.
- Supplies is the average of passenger and cargo supply. Passenger supply depends on how many residents use public transport and is at its maximum from 50% line usage; cargo supply counts the best-served district with cargo demand.
- Several ratings only count what happens inside the town's boundaries, which show up while the town window or a matching layer is open.
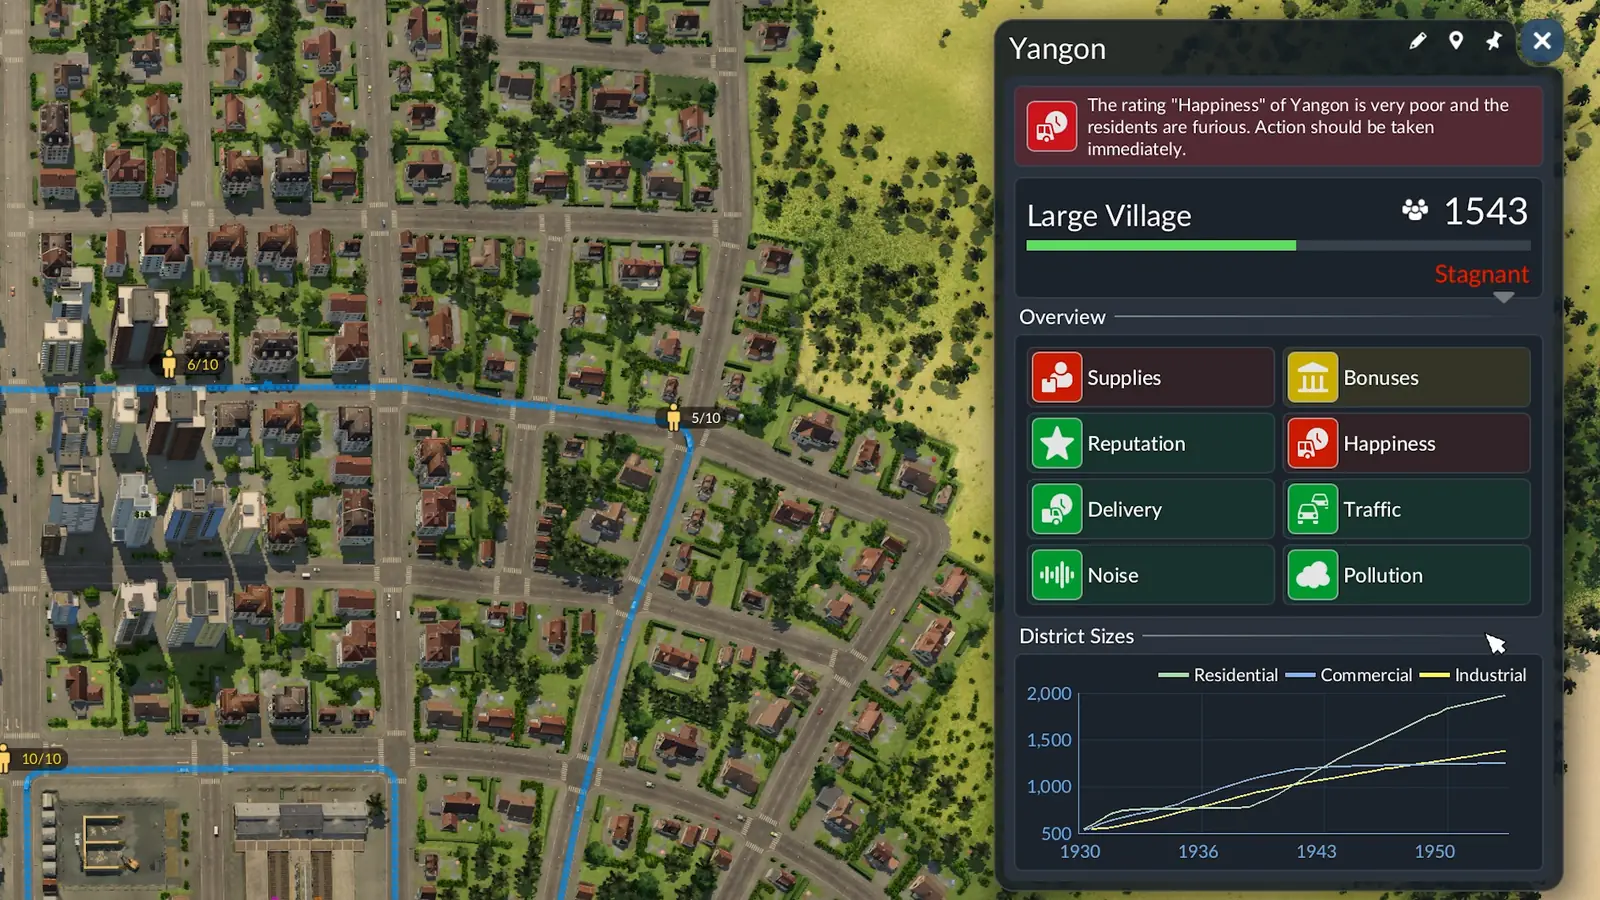
The town window shows the level and the number of residents at the top. Its progress bar shows how close the next level is and whether the town is growing or stagnating; expand it for a breakdown of what drives growth. Every new level is marked with a celebration.
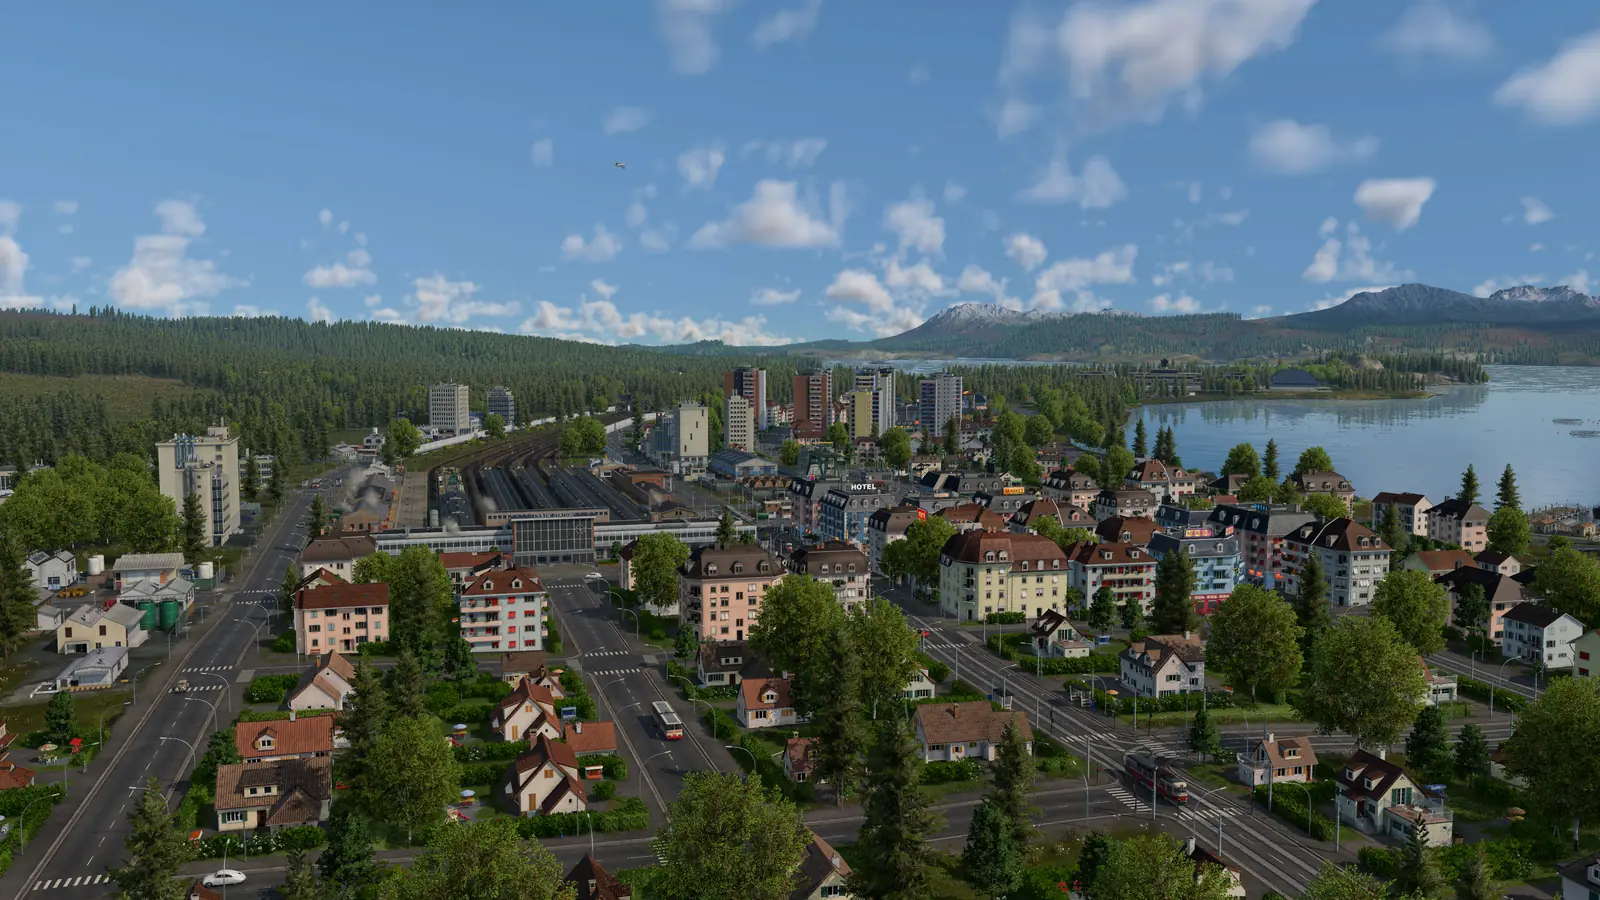
Towns put up new buildings and enlarge old ones where buildings are well used, land value is high and the area is easy to reach; public transport and cargo deliveries to shops and workplaces help too. Towns also lay out new streets or upgrade old ones to make room. Districts can grow at different speeds, depending on their supply ratings. For a shop or a workplace, the supply rating is the share of its cargo needs being met right now. The higher it is, the better the building's chance to level up.
Towns also ask for more cargo as they grow:
- From the start: one cargo demand each in the commercial and industrial district
- Level 5: a second commercial demand
- Level 7: a second industrial demand
- Level 9: a third commercial demand, possibly for a cargo of the highest complexity
- Level 11: a third industrial demand, possibly for a cargo of the highest complexity
Cars or your lines?
Residents compare the time and cost of your public transport with going by car, and their movement preference caps how much time and money they will spend on public transport. More and better connections win some drivers over.
In the early years there are hardly any cars that can compete with public transport. Later, cars get faster and may beat your lines on speed, and residents accept longer trips to work and shops.
Towns built close together can slow the game down, because private traffic has so many possible routes. Leaving more space between towns helps.
Subsidies and transfer-free connections
A subsidy is a contract with a deadline. Nothing starts until you accept the offer, and turning it down costs nothing. Each offer lists its task, its rewards and what happens if you miss the deadline.
- Supply Industry: A new industry that has produced nothing so far wants the cargo it runs on. Bring it the amount the offer names. Each item you drop off counts toward the target.
- Supply Town: A town wants one cargo type for a demand in its commercial or industrial district. Get the full amount of that cargo into the town's buildings before the deadline; the card on screen keeps count.
- Connect Towns: Two towns want a passenger connection. Run one line that stops in both towns and carry at least one passenger from one town to the other without changing lines. Passengers have to actually ride it; a line nobody uses does not count.
- Transport Workers: An industry wants workers from nearby towns to raise its production. Carry passengers to that industry until its extra output from workers kicks in. The card on screen shows how far along you are.
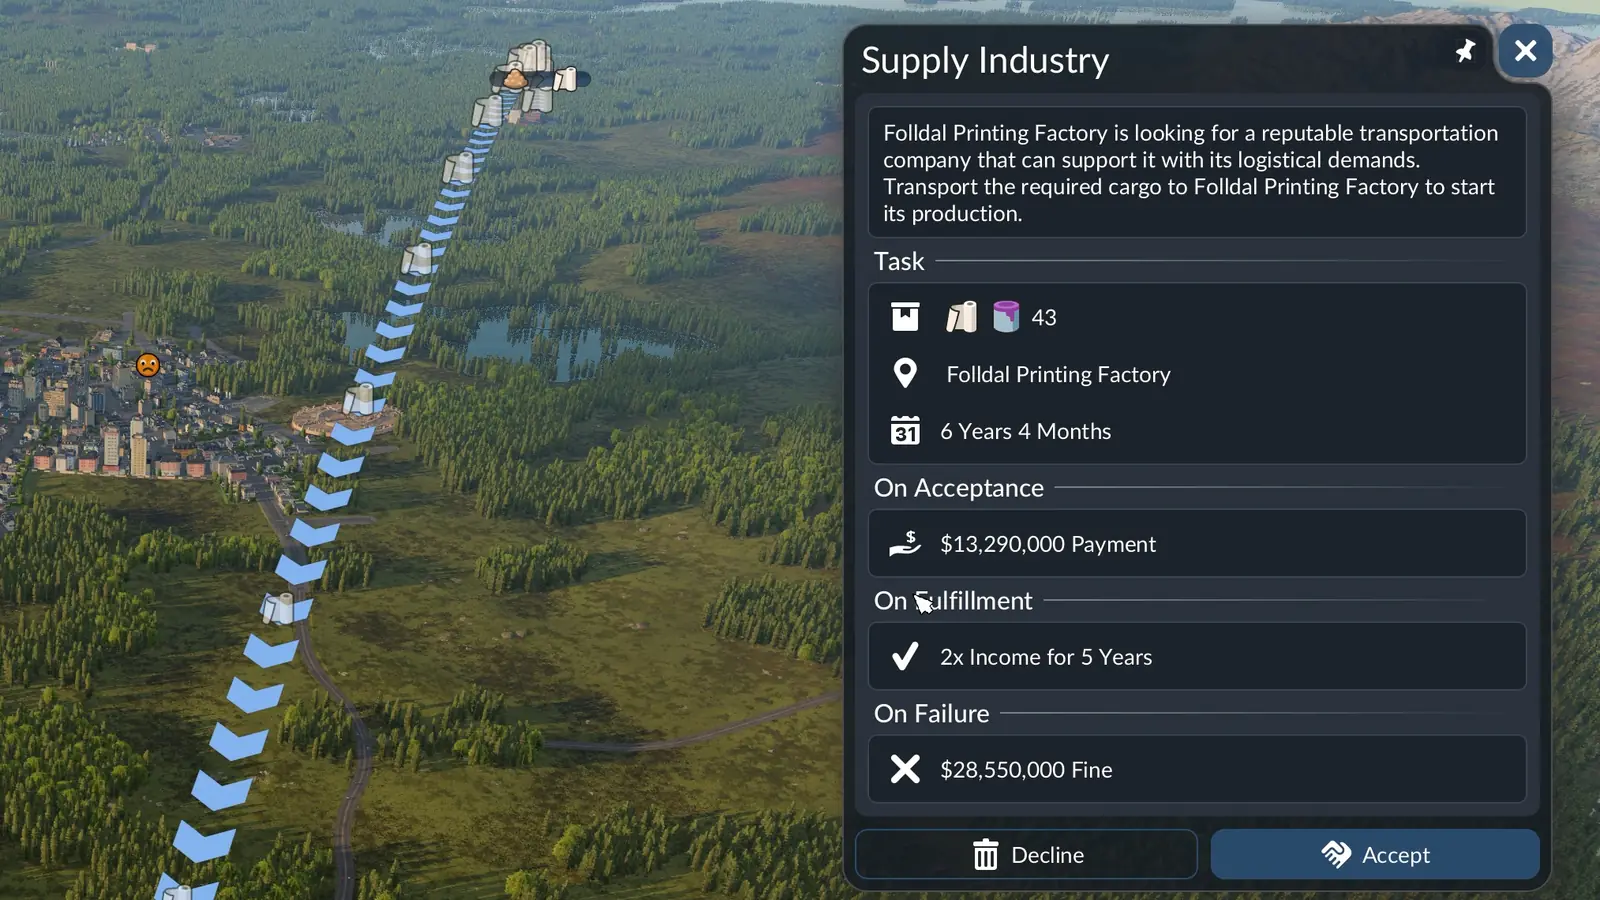
What you get. When you accept: you usually get cash in advance, or a boost to a town's reputation. When you finish: town XP, an extra payment, or double income for a while on the lines that qualify. If you miss the deadline: the upfront reward is taken back, and you may also pay a fine or lose reputation in the town.
Subsidies Availability: how frequently new subsidy offers turn up. Subsidies Risk: higher risk means larger delivery targets, shorter deadlines and smaller upfront payments. For a Supply Town or Supply Industry offer, the production chain planner shows which industries make the cargo, and the cargo unloading guide covers getting it to the right building.
Settings that change town growth
Free Game, Gameplay Settings tab. Picking a difficulty level at the top fills in all of these.
- Reputation (Town Ratings): Turns the reputation rating on or off.
- Traffic Sensitivity (Town Ratings): How much congested roads hold towns back. Higher values make towns more sensitive.
- Happiness Sensitivity (Town Ratings): How much unhappy passengers hold towns back. Higher values make towns more sensitive.
- Delivery Sensitivity (Town Ratings): How much late cargo holds towns back. Higher values make towns more sensitive.
- Noise Sensitivity (Town Ratings): How much noise near homes holds towns back. Higher values make towns more sensitive.
- Pollution Sensitivity (Town Ratings): How much pollution holds towns back. Higher values make towns more sensitive.
- Vehicle Maintenance Effect (Economy): How hard poor maintenance hits older vehicles: more noise, pollution and running costs, less top speed, power and comfort. None switches the effect off.
- Subsidies Availability (Economy): How frequently new subsidy offers turn up.
- Subsidies Risk (Economy): Higher risk means larger delivery targets, shorter deadlines and smaller upfront payments.
With the built-in Sandbox Mode mod switched on, every town can get its own sensitivities.
What the manual does not say
- Which cargo types count as least, middle or most complex. The manual only gives the three XP values (10, 20 and 40).
- The formula for the XP multiplier. The manual only says it depends on the Authority and Supplies ratings, plus the headquarters bonus.
- How the game rounds the XP steps. Starting with the step from level 5 to 6, the 1.5 rule gives fractions (5,062.5 XP); this page rounds them to whole XP.
- How far noise and pollution reach, or how strong they are in numbers.
- Which landmarks besides the Colosseum change noise or pollution.
- What the Bonuses tile in the town window counts. It appears in a pre-release press screenshot, but the manual does not mention it.
If you have seen any of these in game, we would like to hear about it.
Frequently asked questions
What is a transfer-free connection in Transport Fever 3?
It is what the Connect Towns subsidy asks for. Two towns want a passenger connection. Run one line that stops in both towns and carry at least one passenger from one town to the other without changing lines. Passengers have to actually ride it; a line nobody uses does not count.
How do I reduce noise in Transport Fever 3?
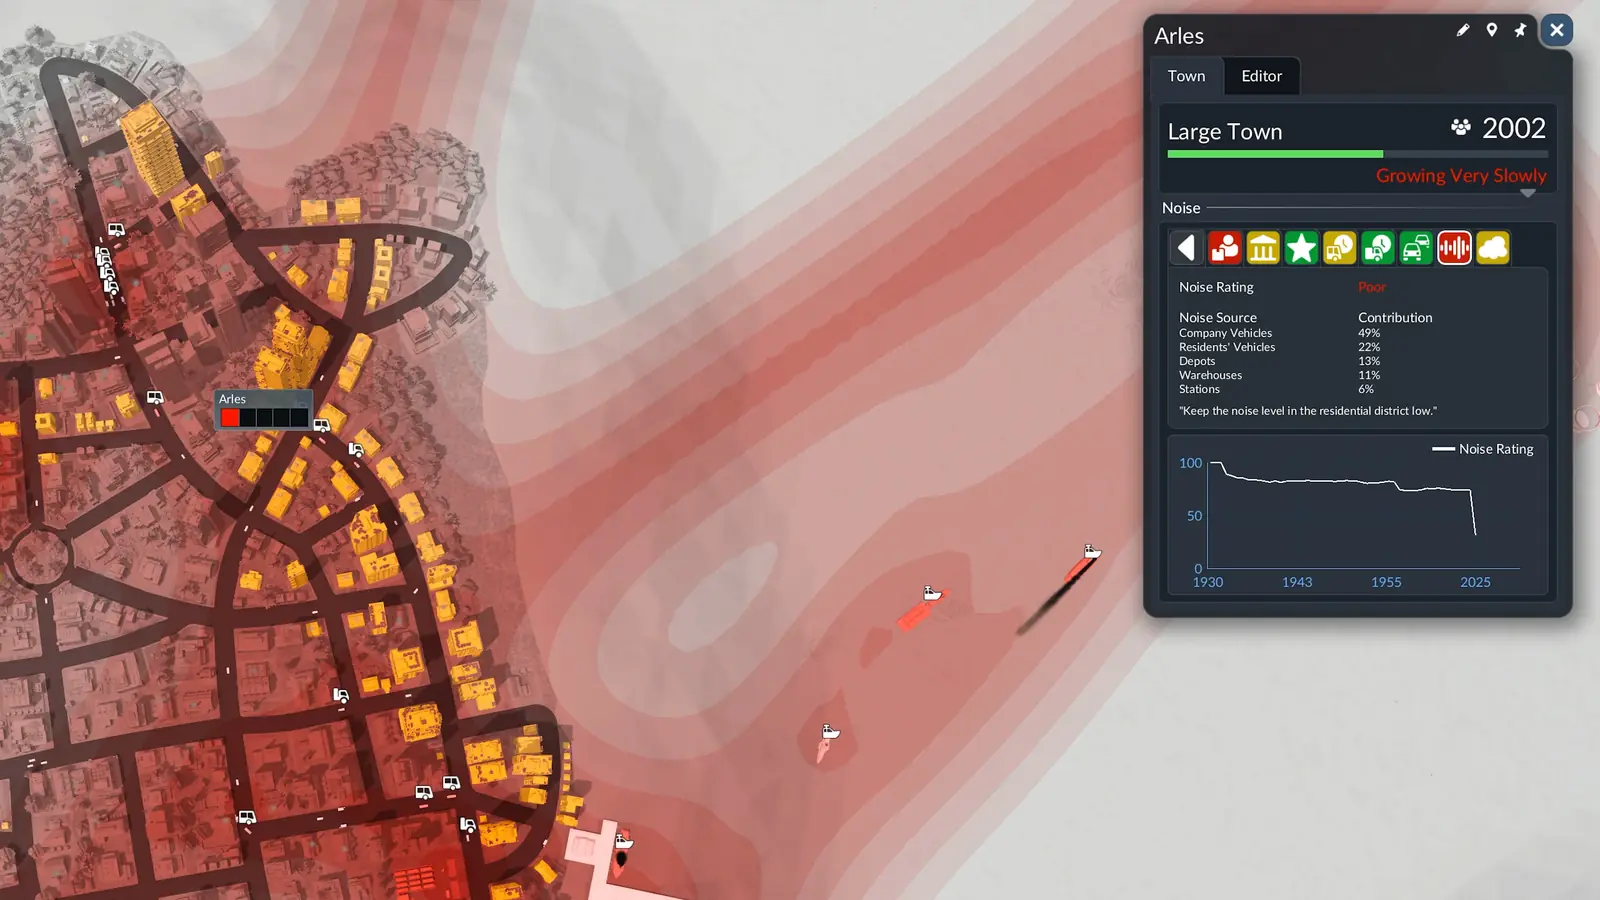
Noise only hurts the residential district, so keep busy roads and tracks away from homes. Add noise barriers to streets and tracks next to them (no buildings can stand along a street that has a noise barrier), line streets with trees using the Alley tool (the street's top speed goes down), steer lines around homes with waypoints, and use modern vehicles with high maintenance. With the right perks, the Colosseum landmark lowers road vehicle noise and industry greenification quiets one industry. The noise layer shows noisy areas in red, deeper red for more noise. Buildings that suffer from it turn orange.
How do I reduce pollution in Transport Fever 3?
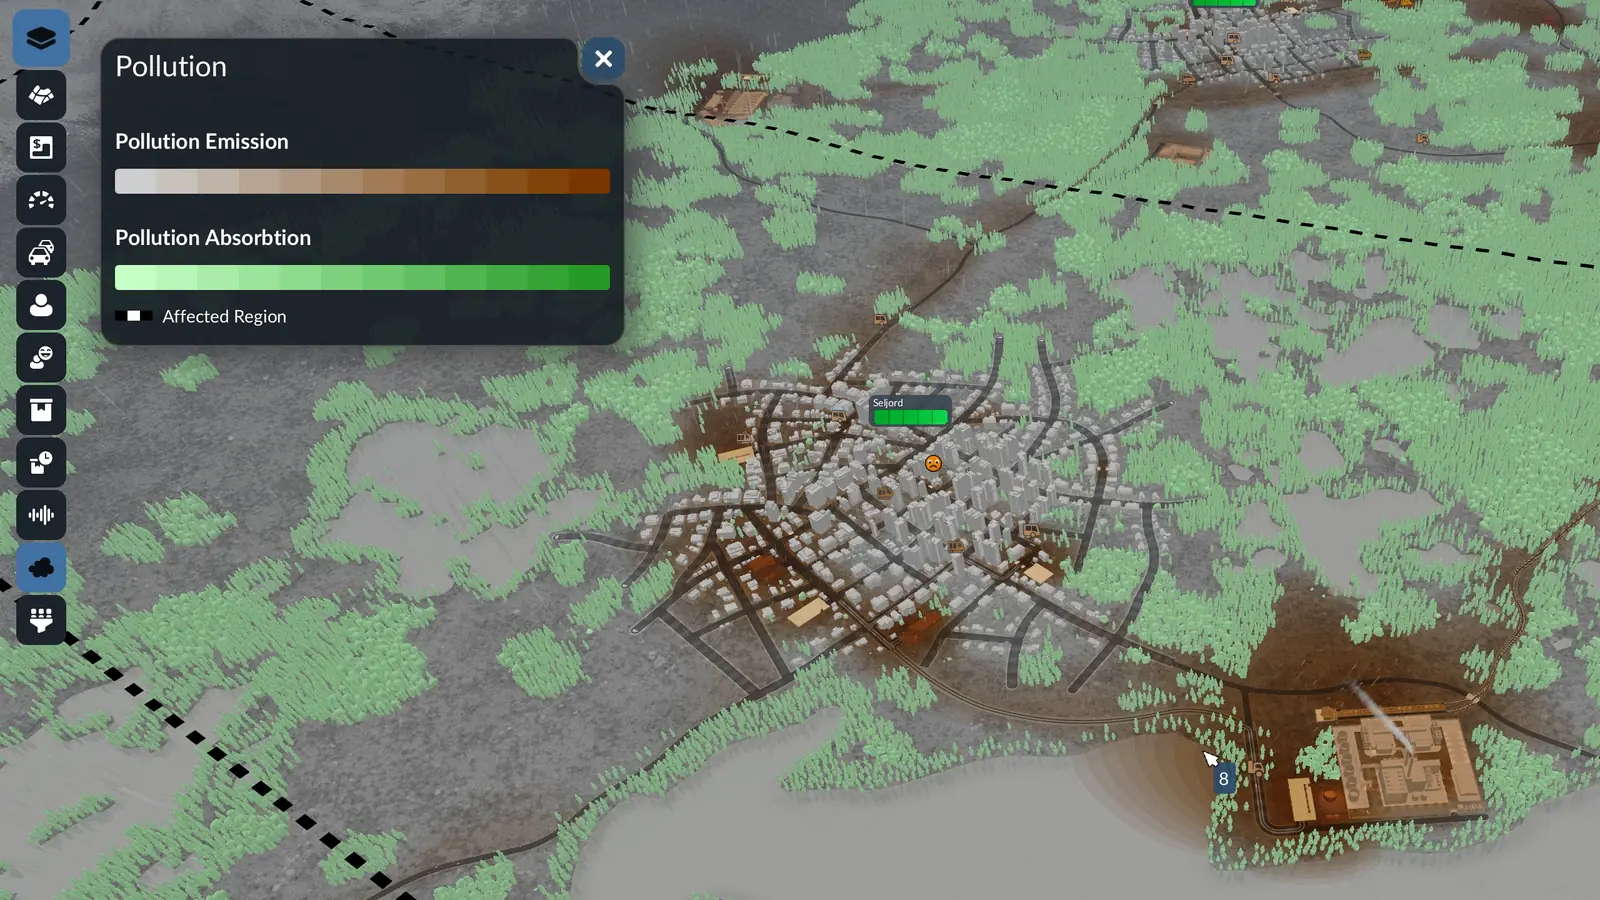
Pollution counts across the whole town area, not only near homes. Line streets with trees using the Alley tool, replace old vehicles with modern low-emission ones and keep their maintenance high, and once your rank unlocks them, greenify polluting industries or build a pollution cleaning plant. A cleaning plant absorbs emissions, but it is very loud, so keep it away from homes. The pollution layer shows emissions in brown and absorption in green; the stronger the color, the larger the amount.
Why is my town not growing?
A single bad rating is enough to stall a town's growth, so the manual's advice is to supply the commercial and industrial districts and keep every rating in the green. Open the town window: its progress bar shows whether the town is growing or stagnating, and expanding it gives a detailed breakdown. Authority is only as good as the weakest of six ratings (Reputation, Happiness, Delivery, Traffic, Noise, and Pollution), so fix the lowest one first, and keep the Supplies rating up with stops near homes and at least one district well supplied with the cargo it asks for, because that rating counts the best-supplied district.
How much XP does a town need to level up?
1,000 XP to reach level 2, and each later level-up takes 1.5 times the one before, so reaching level 18 (Large Metropolis) takes about 1,968,523 XP in all. A passenger brings 5 XP from the same town, 10 XP from a neighboring town, or 20 XP from a town farther away; cargo brings 10 XP per item of the least complex cargo, 20 XP per item of the middle-complexity cargo, or 40 XP per item of the most complex cargo, before the town's XP multiplier.
Does noise affect commercial and industrial districts?
No. Only the residential district suffers from noise; shops and workplaces are not bothered by it. Pollution is different: it counts across the whole town area.
What do subsidies give you, and what if you fail one?
When you accept: you usually get cash in advance, or a boost to a town's reputation. When you finish: town XP, an extra payment, or double income for a while on the lines that qualify. If you miss the deadline: the upfront reward is taken back, and you may also pay a fine or lose reputation in the town. Turning an offer down costs nothing.
Related tools and guides
Perks such as landmarks, marketing campaigns and greenification are explained in company ranks, perks and prospecting, where town growth also raises your rank. To supply a town's districts, plan the chain in the production chain planner or look up who makes each cargo in Industries and Cargo Types. The guides page lists every guide.
Sources
All game facts on this page come from these pages of the official Transport Fever 3 manual:
- Towns (town levels, growth XP, ratings and districts; revised September 28, 2026)
- Subsidies (the four subsidy types, rewards and penalties; revised September 29, 2026)
- Streets and Tracks (alleys and noise barriers; revised September 29, 2026)
- Statistics and Data Layers (town statistics and the noise, pollution, traffic and satisfaction layers; revised September 29, 2026)
- Free Game (town rating sensitivities, maintenance effect and subsidy settings; revised September 29, 2026)
- Company and Finances (landmarks, special mechanics and headquarters; revised September 29, 2026)
- Lines and Vehicles (waypoints, line noise and the vehicle store; revised September 29, 2026)
- Simulation Overview (how residents choose between car and public transport; revised September 28, 2026)
- Tips and Tricks (keeping every rating green; revised September 29, 2026)
- Vehicles (what a vehicle's emissions value means and how running costs follow maintenance; revised September 28, 2026)
The noise sources, the town window tiles and the subsidy example in the image captions come from screenshots in the official press kit. They were taken before release, so the release version may look or work differently, and the manual does not list these details.
Checked on October 6, 2026. Seen something different in game? Let us know.